
I have been experimenting a bit more with Salt Printing and am finally seeing some better results. I made some drastic changes based on some good advice from other current practitioners.
Coating
Someone suggested the paper I was using may need sizing to allow the chemistry to sit on top of the paper rather than be absorbed. I used standard non flavored gelatin from the grocery store to make a 2% solution and merely brushed it on using a foam brush. It takes about 30 minutes to make the sizing but it can be done in a simple measuring cup. Add 1 packet or 7G gelatin to 100ML water at room temperature and allow it to bloom for 20 minutes. Heat an additional volume of water to 110* F and add to the bloom to make 350ML total volume. Coat the entire side of your paper and mark it with a pencil so you know which side is sized. I use a single dot for marking but others mark the opposite side. I have read that you can also add 2% Salt to this mixture and coat the paper in one step. I chose to apply the sizing by itself.
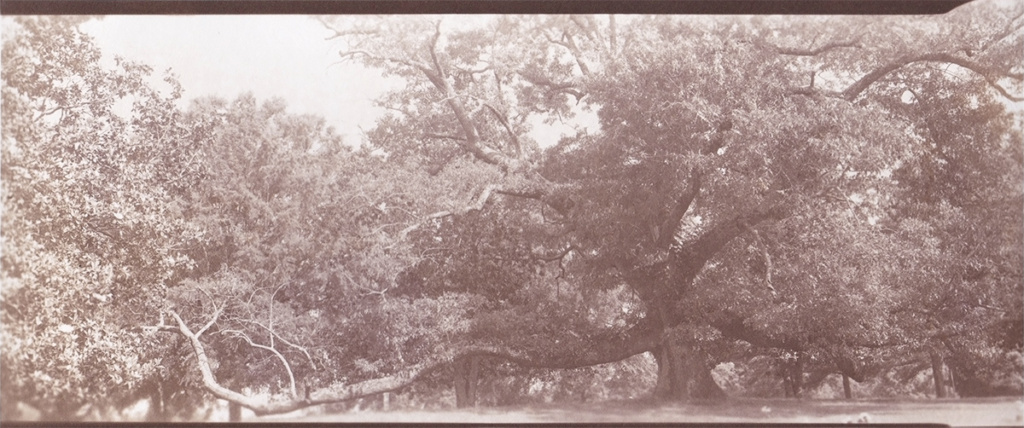
For the image above I also decided to boost the contrast a bit by adding 2 drops of Potassium Dichromate (1% soln) to the 40drops of salt solution. This turns the salt solution yellow which surprisingly makes it easier to see your coating. After allowing the salt layer to dry I added 40 drops of Silver Nitrate and brushed it in. The coating is easier and more even with the sized paper. The real tricks are to make sure you have plenty of volume for coating and to use light strokes to move the liquid around without over brushing.
Exposure
I decided it was difficult to wait for sunny days when I had time to devote to exposing the paper for an hour or more. So I built a UV exposure box using black light LEDs in tubes that are nicely wired and have proper electrical connections vs the DIY LED strips method. the box is simply plywood and 1x4s with risers to allow room to slip in the print frame. Initially I started with 8″ risers but the time of exposure was still about an hour so will likely shorten them down to 2 inches for faster exposures.
Processing
While there are many methods touted for washing the print, the one that stands out is the practice used by Christina Anderson. After Exposure she recommends immersing the print into a tray of 5% salt water (50G/Liter) for 4 minutes. Then into a second tray of 5% salt water for an additional 4 minutes, then followed by a tray of plain tap water for an additional 4 minutes or until print is cleared. I filtered my city water using a Britta pitcher filter to make the salt water and wash water to remove any solids or chlorine. Note that the yellow color introduced by the PD is removed during washing.
I also changed from plain Hypo fixer to using the Photographers Formulary TF4 fixer. Mixed 1:3 from concentrate and fixed for 5 minutes. 5Minutes seems like a long time for paper fixer but since this is an alt process I followed recommendations. I then washed the prints in running water for 10 minutes and allowed to soak for 30 minutes with a water change at 15 mins. Then a quick rinse and hung to dry. UPDATE – Toning salt prints should be longer to make sure there is no residual silver. I had one print turn splotchy again due to short fixing time. I have extended to 10 mins with frequent agitation. Leave one of your test or lesser prints in indirect sunlight for a few days to see if anything new appears, and if it does you can rewash and fix longer your remaining prints.
Toning Test
I did a quick post processing test of a scrap piece in 1:10 Selenium that I mixed a while back. Even after 5 minutes there is no noticeable color shift. I think I will have to try toning before fixing to see if there is more of a shift using selenium. I also have a crazy idea about testing bleach and redevelop using a pyro toner to see what that does. UPDATE: I have found a study that indicates Selenium is not an effective toner for salt printing due to the small size of the grains.
Results
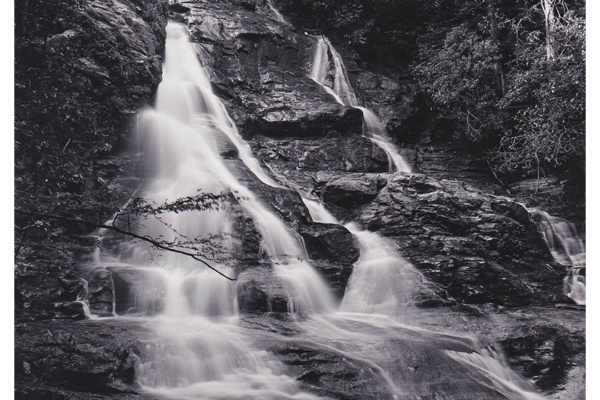
Overall I am much more pleased with the resulting image. The color tone initially is a chocolate brown when wet. But after drying for a week I can tell it has shifted slightly to a darker richer brown tone leaning toward gray vs red. I have one issue with the paper not sitting flat in the cheap frame I am using so need to remedy that with a better contract print frame. This process is a lot of fun and there are many alternative kits and processes I can try over time.
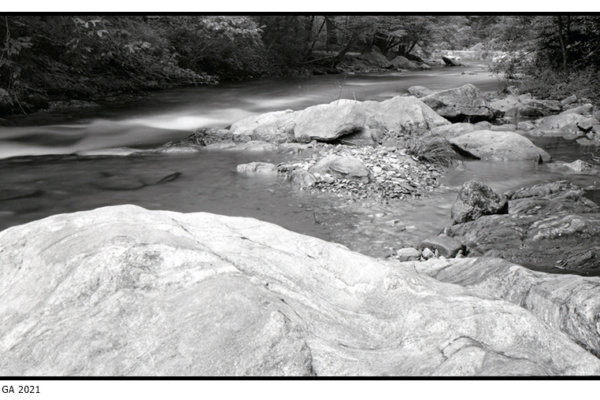
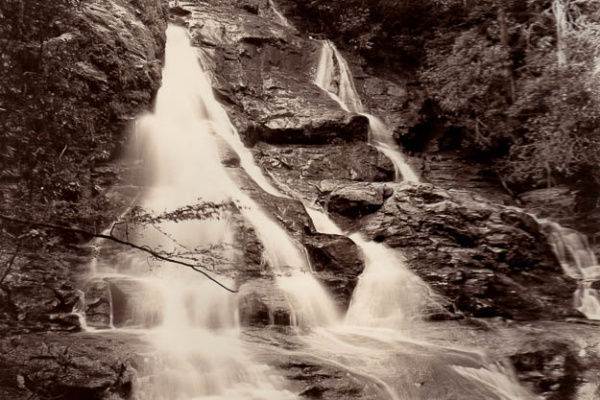
 Frogtown Creek III
 Keeping things fresh
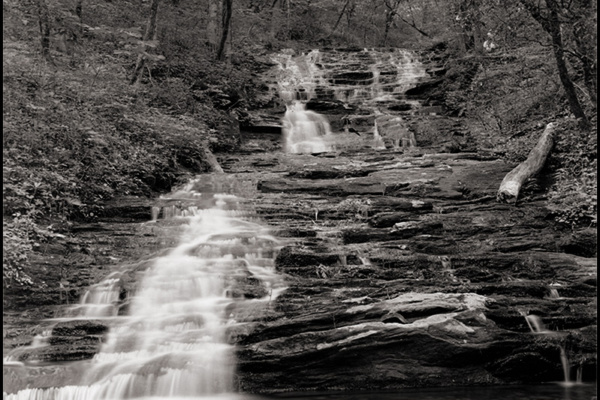