
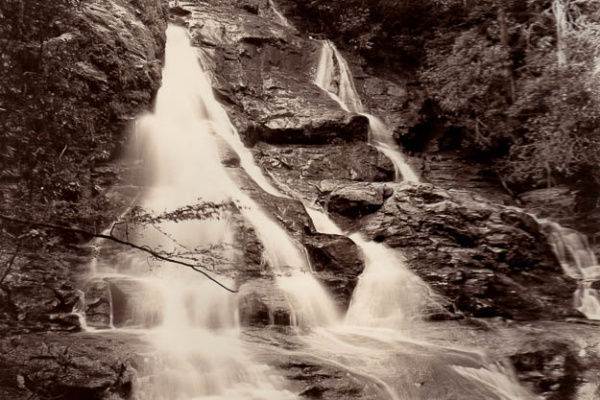
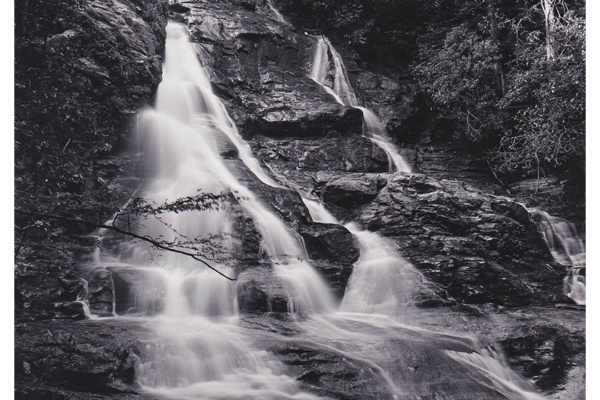
I had a couple of images I wanted to tone brown using Thiourea. I took some iphone shots along the way and decided to make this tutorial. This is an easy to mix toner and simple process. Below are the steps I followed and decisions made along the way. All of these steps can be carried out in normally lit room, no darkness required. The measurements of chemistry below were used for 11×14 trays. Use separate dedicated trays for bleaching vs developer trays. Wash tray should hold substantial amount of water for soaking and running water. You can buy the bulk chemicals or kits for components mentioned below.
1) Print Selection: Select fully developed/fixed/washed prints that are slightly darker than the finished print tone desired. The bleaching and toning will yield a slightly lighter print due to the color shift. Let the print(s) soak in room temperature water for 5 minutes or longer. Use your test strips and test prints as guides during the bleaching and toning steps before tackling a fine final print. Different papers will tone differently so you have multiple options for look and color. IF water quality is an issue in your area, you can use filtered or distilled water for all steps.
2) Mix Thiourea Toner in 2 parts. For my color tone I wanted a darker chocolate brown color so I chose to mix 2 grams of Thiourea into 500 ml water (part A), and 8 grams of sodium hydroxide in 500ml of cold water (Part B). Sodium hydroxide will cause hazardous fumes and steam if put in warm water or if making a stronger stock solution. I am making a working strength solution rather than stock for later dilution. After both solutions are mixed you can combine them to make 1 liter of working solution. If you want more golden tones or somewhere in the middle, adjust your ratio of Thiourea and Sodium Hydroxide. TIP if you plan on toning a bunch of prints or if you want to try different ratios, make parts A and B as 10% solutions, then use at total of 100ML per liter to make the final toner. 20T +80SH will yield the same 2gT+8gSH in my working batch. Classic sepia tone will vary by paper but you can try 4gT + 6gSH or 6gT +4gSH to one liter of water. Using stock solution you can refine color by using ratios like 56mlA + 44mlB if you want to. Different prints will yield different tones too depending on area of mid and dark tones in the image. You can make a test strip for evaluating the color and tones as I have done in my earlier article Thiourea Toning Tests Continued.
3) Mix your Bleach. I normally use a simple bleach made from 20g of Potassium Ferricyanide + 10g Potassium Bromide in 1 Liter of water at room temperature. This dilution will bleach most prints in about 1-2 minutes depending on volume of dark tones. Bleach will be a medium yellow color. For today’s experiment I actually made it more dilute by using 5g PF + 2.5g PB. Using more dilute allows you bleach partially or fully but it takes longer giving you a bit more control. Bleaching starts in the highlights and takes a while to fade the black tones. TIP: Any reducing bleach will work. Dicromate based bleaches may harden and tan the emulsion giving a different appearance in the dark tones. Do not re-fix after bleaching or you loose all the silver needed for redevelopment.
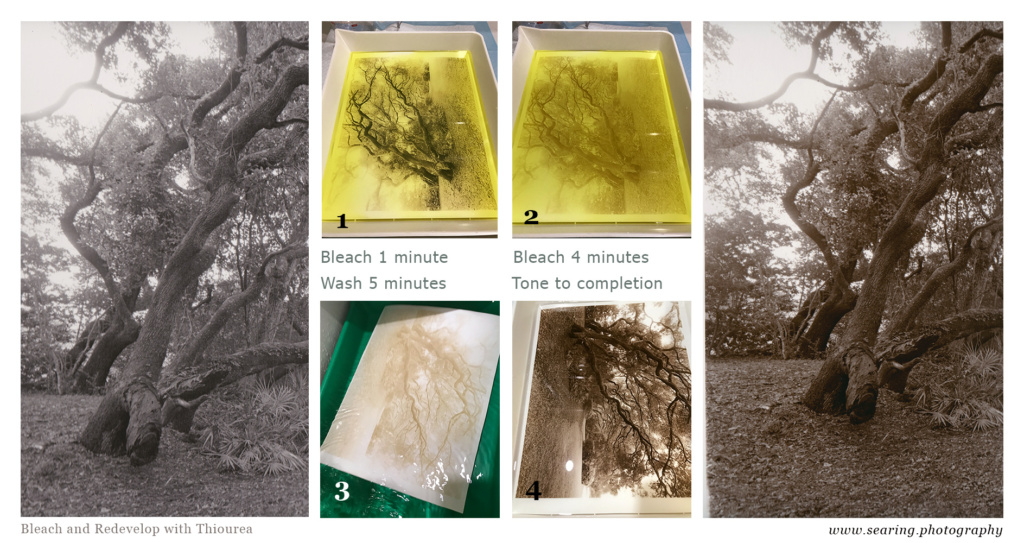
4) Insert the wetted print into the bleach and start your timer. You should continually agitate the tray by lifting and lowering to replenish the bleach over the entire image. You can pull the print at any stage of bleaching that you want. If you just want highlights toned stop after 1 minute in my 1/4 dilution above. I ended up going for about 5 minutes which faded even the darkest tones and borders. You can see in the image above the difference between 1 minute and 4 minutes (#1 vs #2 in image above). The bleached dark tones will never go white but will be a light tan color. When you want to stop the bleaching action rinse the print in running water to remove most of the surface bleach . Then soak or wash the print for at least 5 minutes (#3 in image). You can do a couple of prints together in the bleach if going for full bleaching. Wash all your bleached prints together before toning with frequent water changes.
5) Redevelop the print. Pour the mixed room temperature toner into your tray so it has about 3/8-1/2 inch of toner. Immerse the bleached and washed print into the toner as you would normal developer. You will see it working right away but there will be some muddy areas in the midtones. Continuous agitation of the tray will help the redevelopment process. Once there is no more apparent muddiness and all your highlight tones have reappeared you can remove the print. I find it takes between 2 and 3 minutes depending on quantity of bleached area. Once your redevelopment starts taking longer than 3 minutes you will need to add more toner to your working batch. 1 Liter should get you through several 8×10 prints. You can do several prints together shuffling top to bottom every few seconds as long as they stay under the developer. I prefer to do two back to back and flip them every 30 seconds.
6) Washing. Pull the print from the toner and wash for at least 15 minutes to 30 minutes. Fiber based papers need to be washed longer than resin coated papers. The toner should leave no stain to the white borders of the paper. You can stop here if satisfied with the results. The wet print will appear sharper and brighter while wet, so wait until dry to evaluate the final tone and color. I feel even dry brown toned prints look sharper because the darker details tend to be brighter and thus more open and has better local contrast in between mid tones.
7) Optional Selenium for another pass. If you still have some unbleached redeveloped areas in your print you can make another pass with selenium diluted 1:6 or more dilute. You may notice that your blacks will darken a bit more since selenium affects the darkest tones first and will replace any silver not bleached. I have found in practice that in a mostly bleached print the dark tones will be brown and selenium has very little affect to overall color tone. It does help with image permanence if you are concerned about such things. In a partially bleached print you can get some interesting black vs tan/sepia/red tones depending on volume of overall tones in your image and level of bleaching. Wash your print again for 30+ minutes.
That is basically all there is to changing the image from gray to brown using Thiourea as your toner. You can experiment by changing any of the properties and ratios above to achieve different results until you find the look you want. Some people do not like a brown tone image and prefer a more golden or sepia tone if departing from the classic grey tones. Prints larger than 11×14 will require larger volumes of chemistry in the tray to fully immerse the image.
Experiment and have fun. If you partially bleach only the highlights and redevelop with a golden dilution of thiourea (80/20), then bleach further and use a brown dilution (20/80) you can get some different split toned effects with different shades of brown. Controlling all the tones is not practical but you may find certain images are better for your creative interpretations than others. Mostly black images may look better using a partial highlight only bleach redeveloped with a sepia tonal mix (50/50). You can also use dilute normal print developer for part of the redevelopment process and bring the blacks back, quick wash, then insert the print into the thiourea to get a mix of black/brown tones.
Please comment and share your experiences or questions about toning your images. I look forward to hearing from y’all.
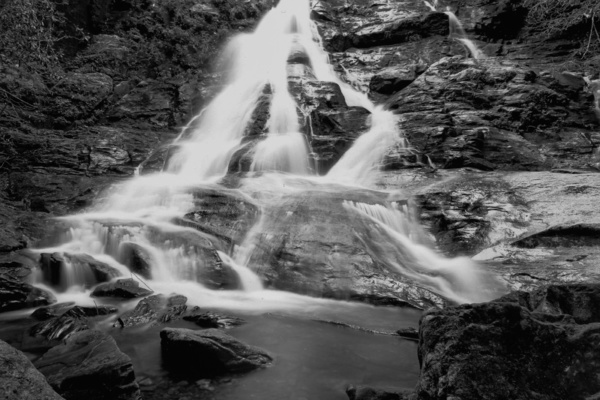
 Inspiration 2023
 Ilford MGRC Portfolio Pearl First Impressions